Beranda
/ How To Install Herringbone Tile Backsplash : Herringbone Backsplash Completed Youtube / Quantity includes typical waste overage, material for repair and local delivery.
How To Install Herringbone Tile Backsplash : Herringbone Backsplash Completed Youtube / Quantity includes typical waste overage, material for repair and local delivery.
Insurance Gas/Electricity Loans Mortgage Attorney Lawyer Donate Conference Call Degree Credit Treatment Software Classes Recovery Trading Rehab Hosting Transfer Cord Blood Claim compensation mesothelioma mesothelioma attorney Houston car accident lawyer moreno valley can you sue a doctor for wrong diagnosis doctorate in security top online doctoral programs in business educational leadership doctoral programs online car accident doctor atlanta car accident doctor atlanta accident attorney rancho Cucamonga truck accident attorney san Antonio ONLINE BUSINESS DEGREE PROGRAMS ACCREDITED online accredited psychology degree masters degree in human resources online public administration masters degree online bitcoin merchant account bitcoin merchant services compare car insurance auto insurance troy mi seo explanation digital marketing degree floridaseo company fitness showrooms stamfordct how to work more efficiently seowordpress tips meaning of seo what is an seo what does an seo do what seo stands for best seotips google seo advice seo steps, The secure cloud-based platform for smart service delivery. Safelink is used by legal, professional and financial services to protect sensitive information, accelerate business processes and increase productivity. Use Safelink to collaborate securely with clients, colleagues and external parties. Safelink has a menu of workspace types with advanced features for dispute resolution, running deals and customised client portal creation. All data is encrypted (at rest and in transit and you retain your own encryption keys. Our titan security framework ensures your data is secure and you even have the option to choose your own data location from Channel Islands, London (UK), Dublin (EU), Australia.
How To Install Herringbone Tile Backsplash : Herringbone Backsplash Completed Youtube / Quantity includes typical waste overage, material for repair and local delivery.. Please like and subscribe and let me know in the comments what other videos or things you would like to see. Tile backsplash installation labor, basic basic labor to install tile backsplash with favorable site conditions. Once you put up the sheets securely, you can start adding the cut triangles. 3x6 ceramic tile, 6 mm thick. Learn tips, tricks, and potential struggles of this diy kitchen project.
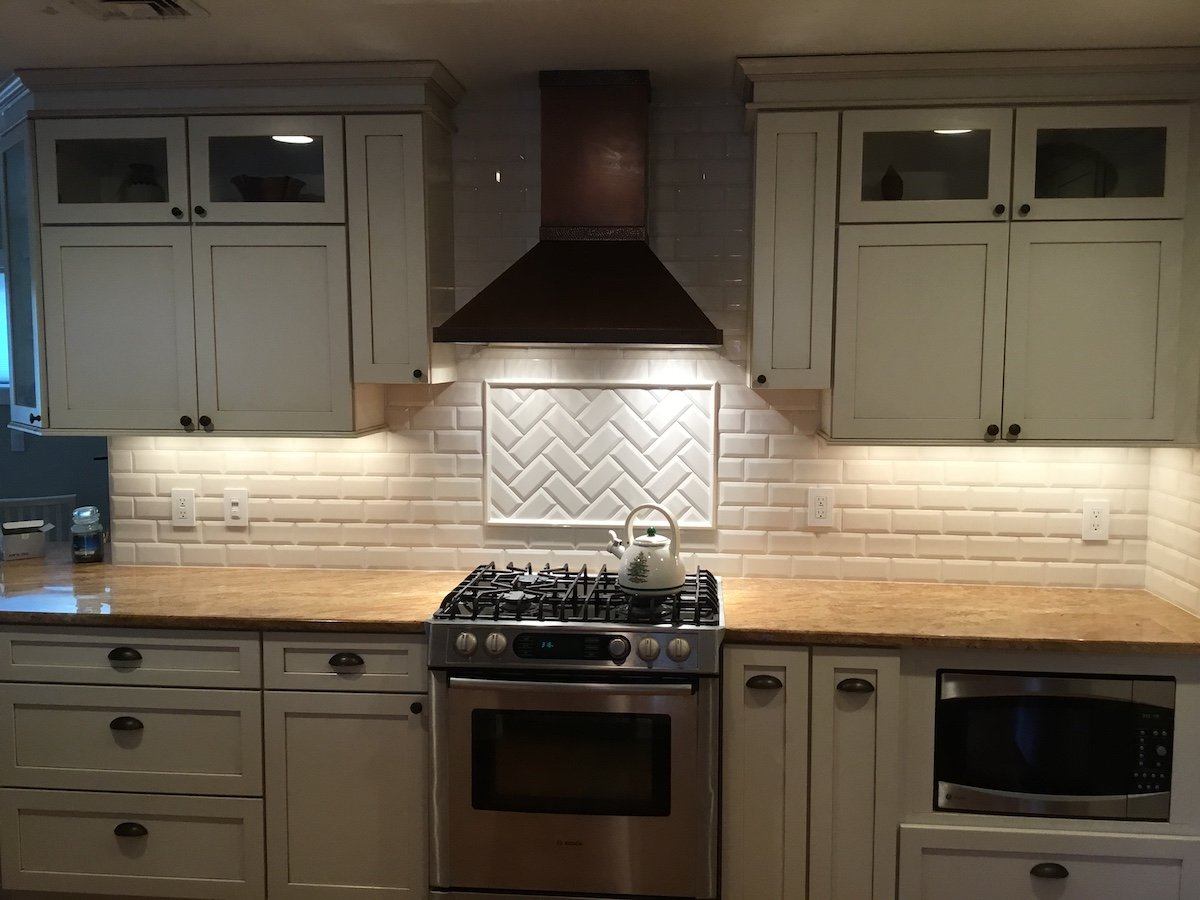
The herringbone pattern uses rectangular tiles (so subway tiles are a perfect option) or parallelograms if you are feeling particularly unique. The size of the rectangles will usually be 2:1 or 3:1 ratios, making the 3 inch by 6 inch subway tiles work very well with this pattern while still keeping its iconic style. Try using a live edge in your installation. Stick it onto the wall and give it a little wiggle to make sure it's sticking. 🙋♀️ looking for your advice and tips.
Subway Tile Back Splash In A Herringbone Pattern Kitchen Backsplash Tile Designs Backsplash Tile Design Herringbone Backsplash from i.pinimg.com Please like and subscribe and let me know in the comments what other videos or things you would like to see. Hold each tile sheet straight across the top and set down your spacers before pressing tile firmly and evenly into the mortar. How to install tile backsplash i started this wall by marking a level line about 1/8 inch from the top of the countertop. When it comes to designing a subway tile backsplash or tiling your bathroom, subway tile is a versatile, functional material that offers homeowners a fantastic range of options when you consider pattern, color, and texture. Use your spacers to make sure the tile is level & adjust if necessary. The herringbone pattern uses rectangular tiles (so subway tiles are a perfect option) or parallelograms if you are feeling particularly unique. Quick video on how to cut and install herringbone sheet ceramic tile for a kitchen backsplash.we are working with a white herringbone mosaic ceramic wall til. 🙋♀️ looking for your advice and tips.
Working out from the first row or column, lay tiles in the herringbone pattern matching your example.
Thanks so much for all of your comments last week, you all are the best!! Stick it onto the wall and give it a little wiggle to make sure it's sticking. It takes quite a while!! The herringbone pattern uses rectangular tiles (so subway tiles are a perfect option) or parallelograms if you are feeling particularly unique. And even though we loved the tile on display….we didn't dig the lighter colored grout so while we were at the store, we made sure to check out the grout colors to get the. A herringbone pattern is created by placing rectangular tiles together so that the short end of one tile is against the long end of another tile, forming a zigzag pattern. Quantity includes typical waste overage, material for repair and local delivery. Work in very small sections (only one or two 12×12 tile sections at a time). Try using a live edge in your installation. Use your spacers to make sure the tile is level & adjust if necessary. For example, you will learn how to place and cut tiles to go around outlets (a necessary but often forgotten step). I see some people say that for this saw, i. Be sure to tape off and protect the metal and glass fireplace.
How to lay and install a herringbone tile floor there are two ways you can lay tile. Then clean off the excess mortar with a wet sponge. This will cover the little triangles. Apply the mortar to the wall using a trowel. Thanks so much for all of your comments last week, you all are the best!!
How To Install A Tile Backsplash Monk S Home Improvements In Nj from monkshomeimprovements.com Tips for laying a herringbone tile pattern. Apply the mortar to the wall using a trowel. The herringbone pattern uses rectangular tiles (so subway tiles are a perfect option) or parallelograms if you are feeling particularly unique. Laying wall tiles in a herringbone pattern isn't that much harder than other patterns. I've always loved the look of herringbone tile and thought it would be a good learning experience. Herringbone tile installation with layout, cutting, and installation advice so you can diy your next tile install project and get professional results. I am about to start a kitchen backsplash install. Then clean off the excess mortar with a wet sponge.
3x6 ceramic tile, 6 mm thick.
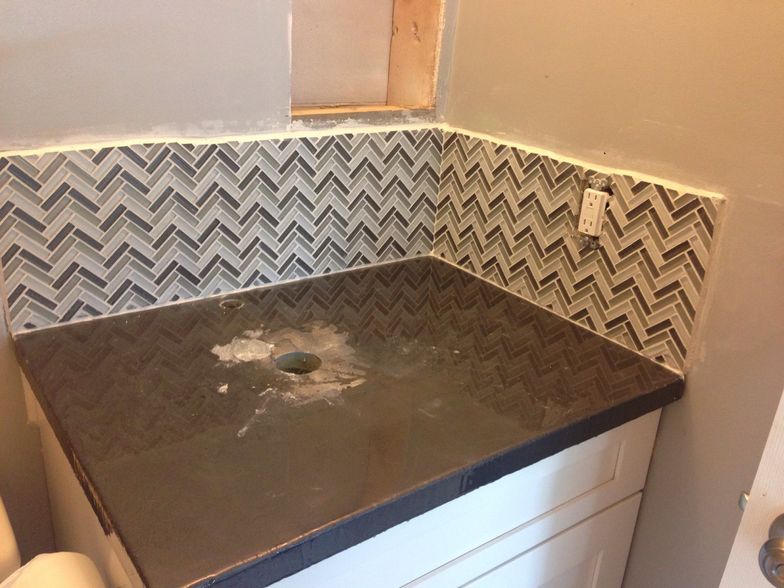
Quantity includes typical waste overage, material for repair and local delivery. It is a fabulous way to update your kitchen. (here's our tutorial for demoing tile) we went with 3×12 athens gray marble from mosaic tile co., it's so gorgeous in person, i was in love!! A standard straight lay pattern with square grout joints and square tiles costs the least. 🙋♀️ looking for your advice and tips. The corner bead looks like a fixed up job. Today, i'm sharing how we installed veined marble tile in a herringbone pattern. I am going to buy the ryobi table wet saw. I am about to start a kitchen backsplash install. It takes quite a while!! A few things to … Please like and subscribe and let me know in the comments what other videos or things you would like to see. Laying wall tiles in a herringbone pattern isn't that much harder than other patterns.
And even though we loved the tile on display….we didn't dig the lighter colored grout so while we were at the store, we made sure to check out the grout colors to get the. Stick it onto the wall and give it a little wiggle to make sure it's sticking. The corner bead looks like a fixed up job. How to lay herringbone tile pattern step 1: Hold each tile sheet straight across the top and set down your spacers before pressing tile firmly and evenly into the mortar.
How To Install Herringbone Backsplash Tile B C Guides from guides.brit.co Hold each tile sheet straight across the top and set down your spacers before pressing tile firmly and evenly into the mortar. How to install tile backsplash i started this wall by marking a level line about 1/8 inch from the top of the countertop. The smaller the tile, the less money it costs to install, as a general rule.herringbone and other patterns add an additional $2 to $4 per square foot, depending on the complexity of the pattern. Learn tips, tricks, and potential struggles of this diy kitchen project. 🙋♀️ looking for your advice and tips. Then clean off the excess mortar with a wet sponge. That space gives some expansion room for the tile, and it'll be caulked when i'm through with the grouting. A few things to …
After the marble herringbone fireplace hearth is done then you can move onto the tiling the surround.
Working out from the first row or column, lay tiles in the herringbone pattern matching your example. That space gives some expansion room for the tile, and it'll be caulked when i'm through with the grouting. How to lay and install a herringbone tile floor there are two ways you can lay tile. Today, i'm sharing how we installed veined marble tile in a herringbone pattern. Work in very small sections (only one or two 12×12 tile sections at a time). I see some people say that for this saw, i. It takes quite a while!! This diy project will show you how to install a backsplash of tiles in a herringbone pattern. Put spacers in between each tile to ensure future ones are straight (and you can spot check with the level regularly). It is a fabulous way to update your kitchen. How to install tile backsplash i started this wall by marking a level line about 1/8 inch from the top of the countertop. Be sure to tape off and protect the metal and glass fireplace. Quick video on how to cut and install herringbone sheet ceramic tile for a kitchen backsplash.we are working with a white herringbone mosaic ceramic wall til.